Approving Campus Vouchers
Overview
Campus vouchers route for approval to Departments and depending on the chartfield and dollar amount, may also route to the Office of Sponsored Research (OSR![]() Office of Sponsored Research) and PreAudit.
Office of Sponsored Research) and PreAudit.
Related Reference
- For general information on campus voucher approvals, see Understanding Campus Voucher Approvals.
- For instructions on approving campus vouchers as a Accounts Payable approver, see Approving Campus Vouchers at the Accounts Payable Level.
- For an overview of all financial approval transactions in ConnectCarolina, see the Approving Finance Transactions quick reference. The approval workflow outlined on the reference is different from that for campus vouchers, however.
Menu Path
From the Admin WorkCenter homepage, choose Finance Workcenter > Accounts Payable > Approval Framework - Vouchers
Steps - Approving Campus Vouchers
Follow these steps to approve a campus voucher:
Note: The steps that Accounts Payable follows to approve campus vouchers are in a separate procedure, Approving a Campus Voucher at the Accounts Payable Level.
- Do one of the following:
- Go to your worklist to display the voucher needing approval.
- Click a link in the e-mail notifying you have a voucher to approve, if you receive email notifications for approvals.
- Choose this menu option:
From the Admin WorkCenter homepage, choose Finance Workcenter > Accounts Payable > Approval Framework - Vouchers
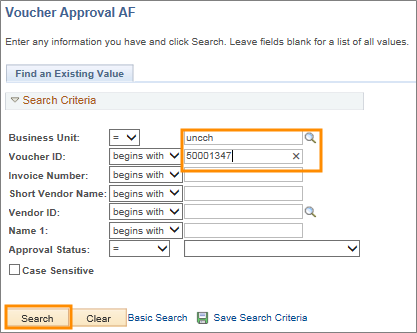
Voucher Approval AF Screen
- Complete the fields:
Common searches include:
- Business Unit and Voucher ID, which will take you directly to the voucher you are looking for.
- Business Unit and Invoice Number, which till take you directly to the voucher you're looking for.
| In this field: | Do the following: |
|---|---|
|
Business Unit |
The business unit represents schools, divisions, or departments within UNC-Chapel Hill.
Leave uncch for the University, or look up, or enter, uncga for General Administration. |
|
Voucher ID |
Look up, or enter, the voucher ID number. The voucher ID is the system-assigned number for the voucher. |
|
Invoice Number |
Look up, or enter, the invoice number. The invoice number is the vendor-assigned number for the invoice submitted for payment. |
|
Short Vendor Name |
Look up, or enter, the short vendor name. |
|
Vendor ID |
Look up, or enter the vendor ID. The vendor ID is a code that uniquely identifies the vendor in the system. |
|
Name 1 |
Look up, or enter, the vendor's primary name. |
|
Approval Status |
Do one of the following:
|
- Click on the Search button.
Result: The system displays the search results list, or goes directly to the Approval tab showing the voucher you entered. If the system displays a search results list, click the voucher you want. Then, the system displays the Approval tab.
Approval Tab
- Review the information on the screen.
- Use the horizontal scrollbar in the Details section to see more infomation if needed:

- Click the Line Information tab:

Result: The system displays the Line Information tab.
Line Information Tab
- Review the line item detail including a description and quantity of items.
- Click on the ImageNow Attachments link to review the supporting documentation:

- Click on the View icon to open the attachment.
- Click OK when you're finished reviewing the attachment:

- Click on the Charge Information tab:

Charge Information Tab
- Review the accounting charge information, using the horizontal scrollbar to see more information if needed:

- Click the Approval tab to return to the first tab:

Approval Tab
- If you want to see other approvers in a workflow level, click on the link to display them.
- If desired, click on the Insert Approver icon (+) to add another approver or a reviewer to the workflow:

- If they display, click the View/Hide Comments link by each approval level to review comments by the originator or previous approvers.
Note: Comments from the originator display at the Department Stage level:

Result: The system displays any comments under the Comments heading below each approver level:

- If you want to add a comment, enter your comment in the Comments field, and click on the Add Comments button:

Result: The system saves the text under the Comments heading at your approval level. Click the View/Hide Comments link if you want to review your note.
- When you're ready to take action on the voucher, do one or more of the following:
- If you're ready to approve the voucher, click on the Approve button.
- If you want to deny the voucher, enter a reason in the comment box, and then click Deny.
- If you want to put the voucher on hold to get more information, click on the Hold button.
- If you want to add a comment, enter your comment in the Comment field and click on the Add Comments button.
- If you're a higher level department approver and want to push back the approval to a previous approver, click on the Push Back button. You only see the Push Back button if you're a second or higher department level approver:

Result: The system grays out the button you chose and does the following:
- If you approved the voucher — sends it to the next level of approvals.
- If you denied the voucher — sends an email to the originator, who can edit the voucher and resubmit it.
- If you put the voucher on hold — placed the voucher in a Hold status until you return to approve or deny it.